|
Tutorial: How to fix a remote control
Guide - Tutorial for infrared remote control repair (IR) for TVs, DVD players, decoders, home theatre, etc . Some tips, tricks and explanations on how to try to fix your damaged infrared remote control. |
||
| With the increasing use of technology today, the remotes we use in our houses for controlling all the devices we need,
are becoming more and more. Unfortunately, due to some reasons (that will be further explained), their buttons often cease to work and the remotes can no longer be used.
Despite these damages, remotes can often be fixed and in this guide it will be explained how to do it.
The explanation concerns Infrared remote controls with: - Bad or total malfunction of one or more buttons caused by dirt on the contacts - Bad or total malfunction of one or more buttons caused by usury induced by contact - Bad or total malfunction of a button caused by a printed circuit's interruption - Check infrared diode (IR) and eventual replacement |
||
In order to attempt to repair the remote, the following objects are necessary (Image 1): new batteries, a screwdriver large enough, some pieces of thin electric wire, insulating tape and a red LED (also recycled). An old unused but working remote control, a soldering iron with a fine tip and a drill for fine points may be also needed, but only after a preventive verification of their usefulness for the work.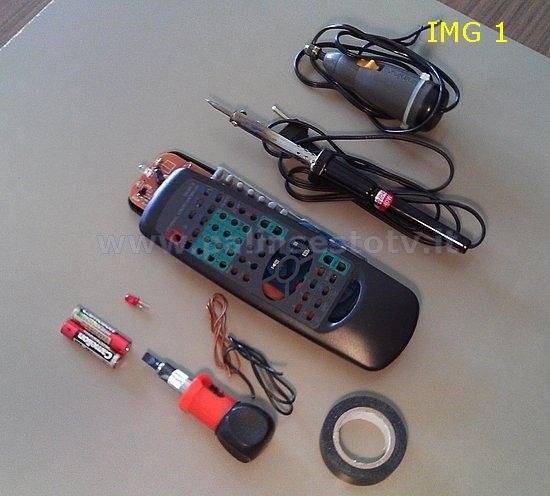 After having replaced the old batteries with the new ones, in order to start you need to place the remote in front of a webcam, a Smartphone or a camera (as you can see in Image 2) and perform some tests, trying to figure out as much as you can about the causes of the failure. The camera enables you to see the flashing infrared diode, otherwise invisible to the human eye. 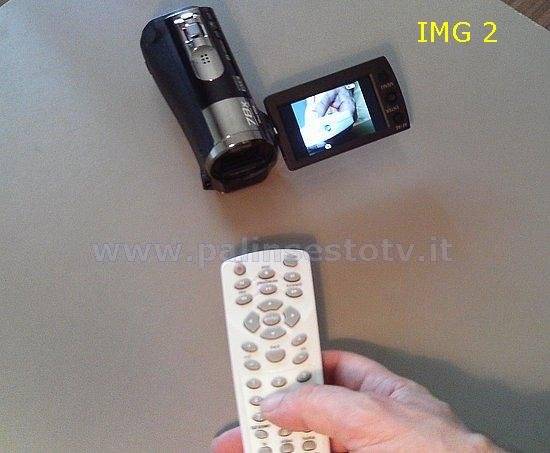 According to the three most common types of failure, the tests you should make are the following: - Failure type 1 : One or more buttons (usually the most used) don't work or it is necessary to push beyond the normal to make them work. Check all the buttons' flashing with the help of the camera. Generally this type of problem is caused by the presence of dirt on the contacts or by the conductive coating button's usury. This is a problem that tends to get worse over time. - Failure type 2: One or more buttons have suddenly stopped working. Check all the buttons' flashing and annotate the ones that do not work. The cause is usually the interruption of a conductive path due to mechanical stress, dropping or crushing / twisting the remote control (the repair is possible only on certain types of remotes). - Failure type 3: No IR diode's flashing while you're pressing buttons. The diode can be burned and, after a preventive test (see guide's follow), it has to be replaced. In this guide it is obviously only taken into consideration the replacement of the diode, as the burn of the CHIP or of other SMD components can be replaced only by a qualified technician. Once the tests are done, we start by opening the remote using the screwdriver (Img. 3-3A-3B) 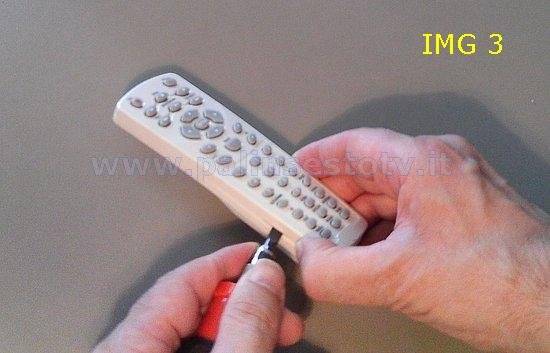 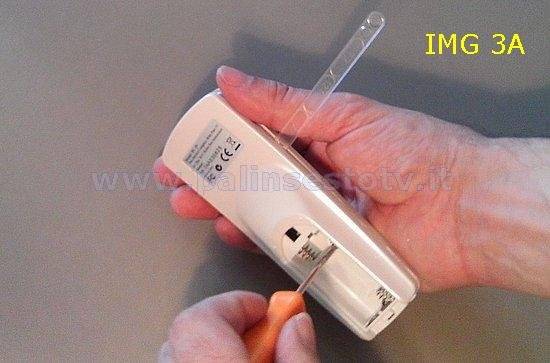 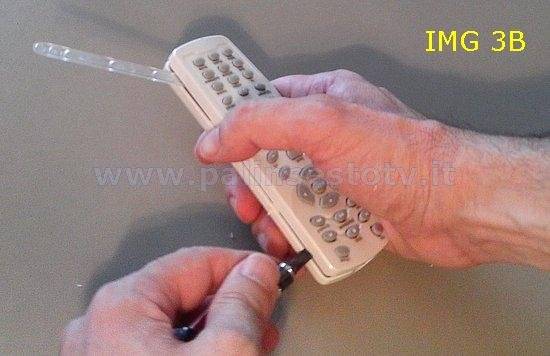 pay attention to adhesive labels, quality control stickers, that often (as in the pictures) hide a screw. If the remote tends to close itself, use a fine piece of plastic, for example a café's spoon, to try to keep it open. Once it is taken to pieces, you'll find a printed circuit, where the IR diode is visible (IMG 4), and a buttons rubber membrane with carry-conductive dots (black dots). 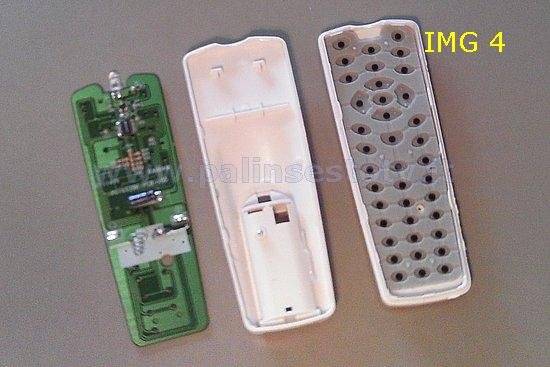 In order to solve Failure type 1, it is necessary to carefully clean the buttons membrane's contacts (IMG 5-5A) and the printed circuit's paths. Car's washing glass liquid (non-dilute) can be used to clean. At the end of the task, partially reassemble the remote, insert the batteries but not the upper shell. Place the remote in front of the camera and check if the button/s work now correctly. 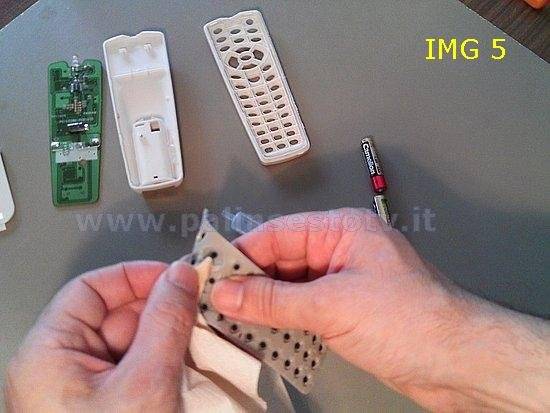 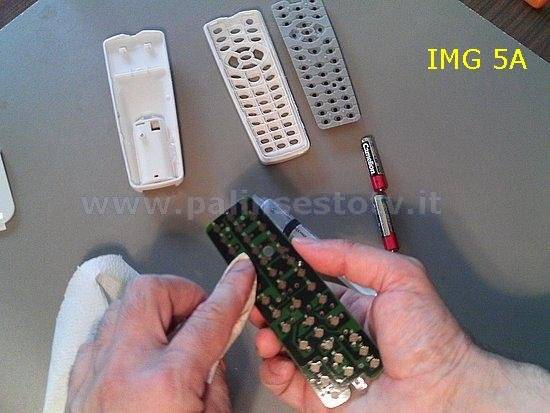 If they still show one or more problems (maybe attenuated) go check these buttons with a lens on the side of the conductive dots, in case these are very shiny or leave a glimpse of the color of the rubber, it means that they are worn out.A solution to restore a good contact would be pasting a disk of foil using cyanoacrylate glue (like Attak), making sure to use the shiny side for the contact.Another more refined solution can be cutting a slice of approximately 0.5 mm from a buttons membrane of a remote that is no longer used (IMG 6-6A), obtaining a good conductive dot to paste on the faulty button, after having removed from the same an equal portion (0.5mm) of worn out conductive rubber. 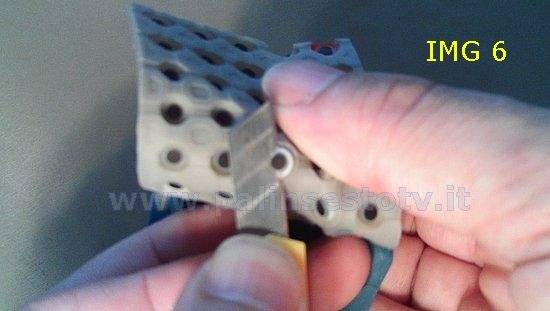 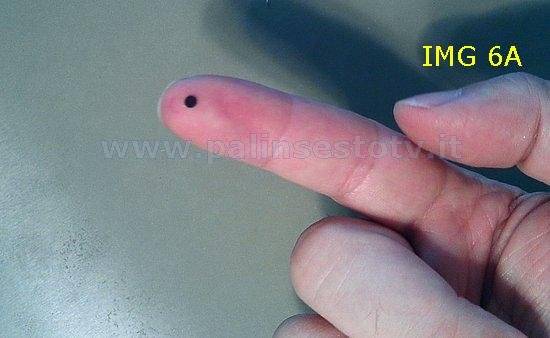 Before trying to repair Failure type 2, it is necessary to power the disassembled remote. To do this, get yourself some fine cardstock and cut it to a length slightly shorter than the 2 batteries (the same way if the batteries are 3 or 4) wrap it around and secure it with tape. Then take 2 pieces of electric wire with stripped ends and, via insulating tape, fix a wire on the negative pole and another one on the positive, keeping the tape well stretched (IMG 7-7A).  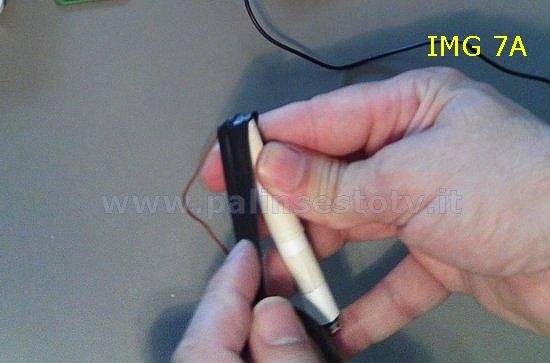 Once finished, attach to the remote the ends of the two wires on the springs on which were placed the batteries (IMG 8). 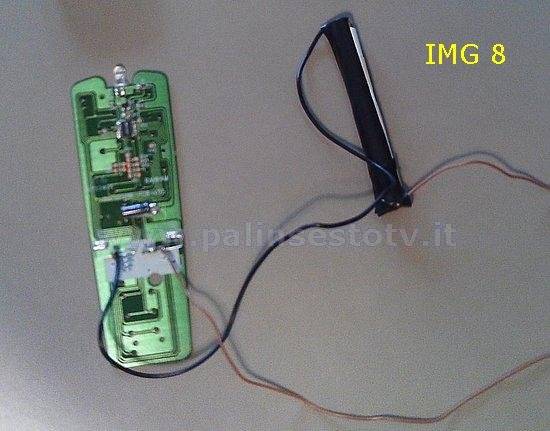 Make sure to respect the positive and the negative polarity. At this point the remote control is powered and, always facing the camera, try to make a jumper with a piece of wire with stripped ends, from the vicinity of the not working button's contacts (IMG ZOOM 1 9) then slowly getting away from it, following the black path till we notice (if we are lucky) that the IR diode is flashing again. This happens because we bypassed, with the jumper, the interrupted point of the path (see IMG 2 ZOOM 9, interrupted point emphasized, normally not visible to the eye). 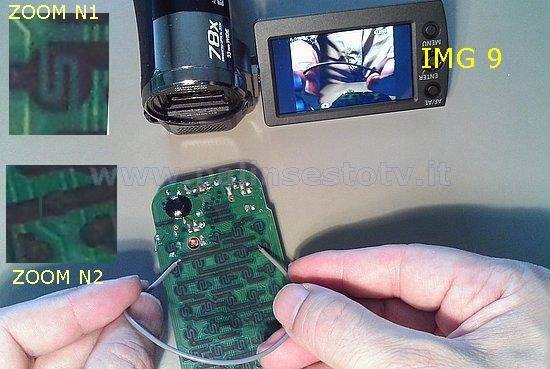 Once we found out -with security- the failure, we have to get us a 1mm (or less) drill bit, and make 4 holes on the sides of the interrupted path (IMG 10). 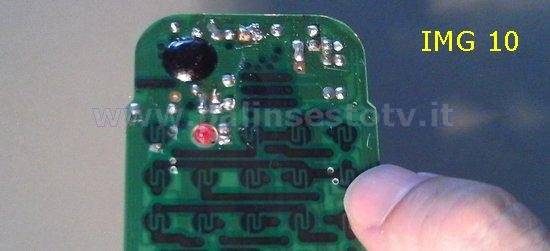 After this, we will have to slide out 1 or 2 copper wires from the cable used for the jumper, in order to recreate, using the 4 holes, the continuity of the track (IMG 11-12). It is important that the wires are well tight to ensure a good contact. 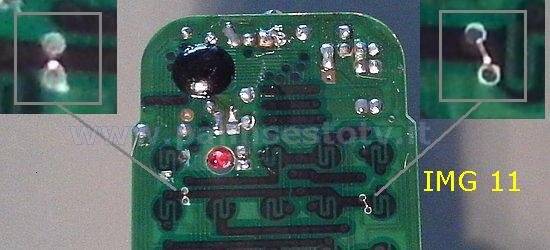 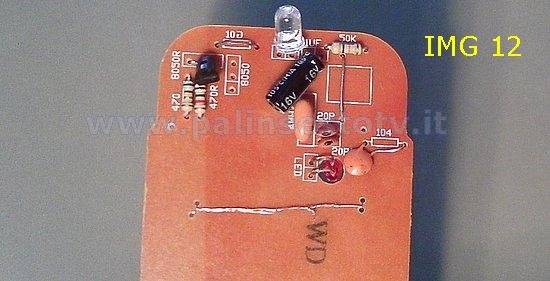 This type of reparation is only possible with remotes that use a construction technology like the one in the picture, fortunately widespread. -Failure type 3: in order to attempt to repair it, it is necessary to have the remote powered (as described above), a LED red diode, so you can test the actual malfunction of the infrared diode without -maybe- having to unsolder/solder anything. 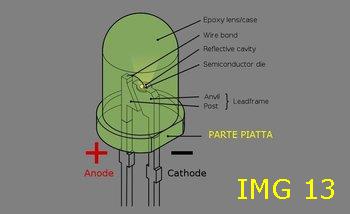 Pay attention to the direction of the LED diodes, to avoid making mistakes, use as a reference the flat part on the diode's cylindrical body (IMG 13). Before proceeding with a screwdriver or a cutter, clean the welds that are headed to the diode on the remote control, removing the oxide and any remnants of the welding process. Place the buttons' membrane so that you can press the buttons, then place the two red LED's contacts on the two points where it is welded the IR diode, taking care that the two reference marks are oriented in the same way. Press a button. If the red LED emits faint flashes (IMG 14) it means, without a shadow of a doubt, that the diode is burned but the rest of the electronics is still good.  To repair it, get yourself a soldering iron with a fine tip (they're sold even for 5 $) and, with the hot soldering iron, proceed to the desoldering, first the faulty diode and then the good one from the recycled remote control (IMG: 15-16), which then you are going to weld on the broken remote. 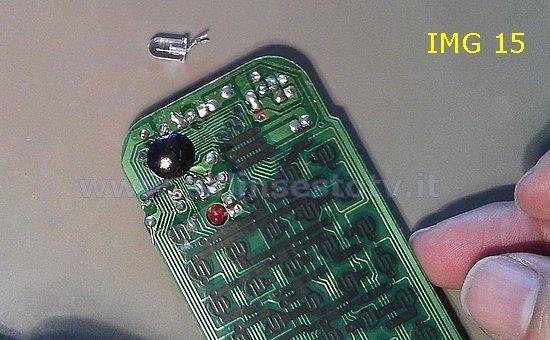 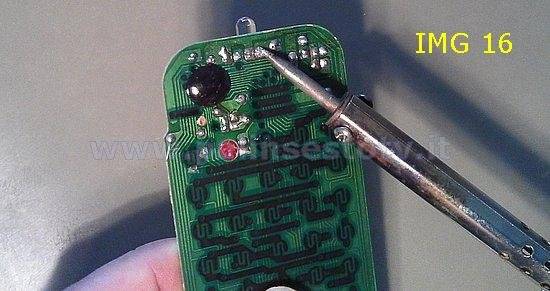 RECOMMENDATIONS: be as fast as you can in desoldering / welding because the plastic body of the diodes cannot stand strong temperatures for more than a few seconds; remember to insert the diode in the right direction through the flat mark's reference. Finally, the remotes' IR diodes, even if not perfectly identical, are usually always compatible with each other. That's it all. Enjoy your reparation! |
||
| ELENCO CENTRI ASSISTENZA |
| HOME PALINSESTOTV |
 |
